
TM 5-3825-270-23&P
0099
DT STYLE CONNECTOR RECEPTACLE REPAIR - Continued
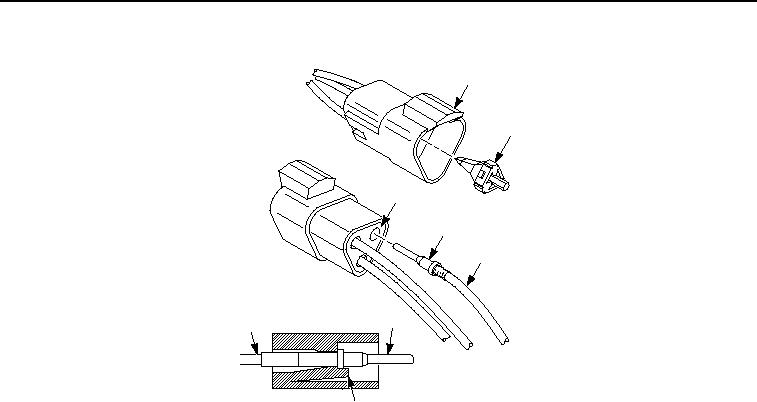
1
2
5
4
3
4
3
6
Figure 1. DT Style Connector Receptacle Repair.
NOTE
Hold rear grommet when pulling terminal and wire out, to prevent displacing rear grommet.
2.
Move locking finger (Figure 1, Item 6) away from terminal (Figure 1, Item 4) to release terminal while gently
pulling wire (Figure 1, Item 3) backwards.
3.
Remove terminal (Figure 1, Item 4) and wire (Figure 1, Item 3 ) from receptacle rear grommet (Figure 1, Item
5).
4.
Cut wire behind old terminal (Figure 1, Item 4) and strip wire (Figure 1, Item 3).
NOTE
Ensure all wire strands are in crimp barrel and visible in terminal inspection hole.
5.
Insert and crimp wire (Figure 1, Item 3) to new terminal (Figure 1, Item 4).
6.
Insert wire (Figure 1, Item 3) and terminal (Figure 1, Item 4) into receptacle (Figure 1, Item 1) through rear
grommet (Figure 1, Item 5) until a click is felt.
7.
Slightly tug wire (Figure 1, Item 3) to verify terminal (Figure 1, Item 4) is properly locked in place.
8.
Install wedge lock (Figure 1, Item 2) into connector (Figure 1, Item 1) until it snaps into place.
END OF TASK
DT STYLE CONNECTOR PLUG REPAIR
NOTE
Tag and mark wires, connectors, and harnesses prior to removal to insure proper installation.
1.
Remove wedge lock (Figure 2, Item 3) from plug (Figure 2, Item 1).