TM 10-4630-207-13&P
0029 00
13. Tear the belt tensioning gage from the instruction card.
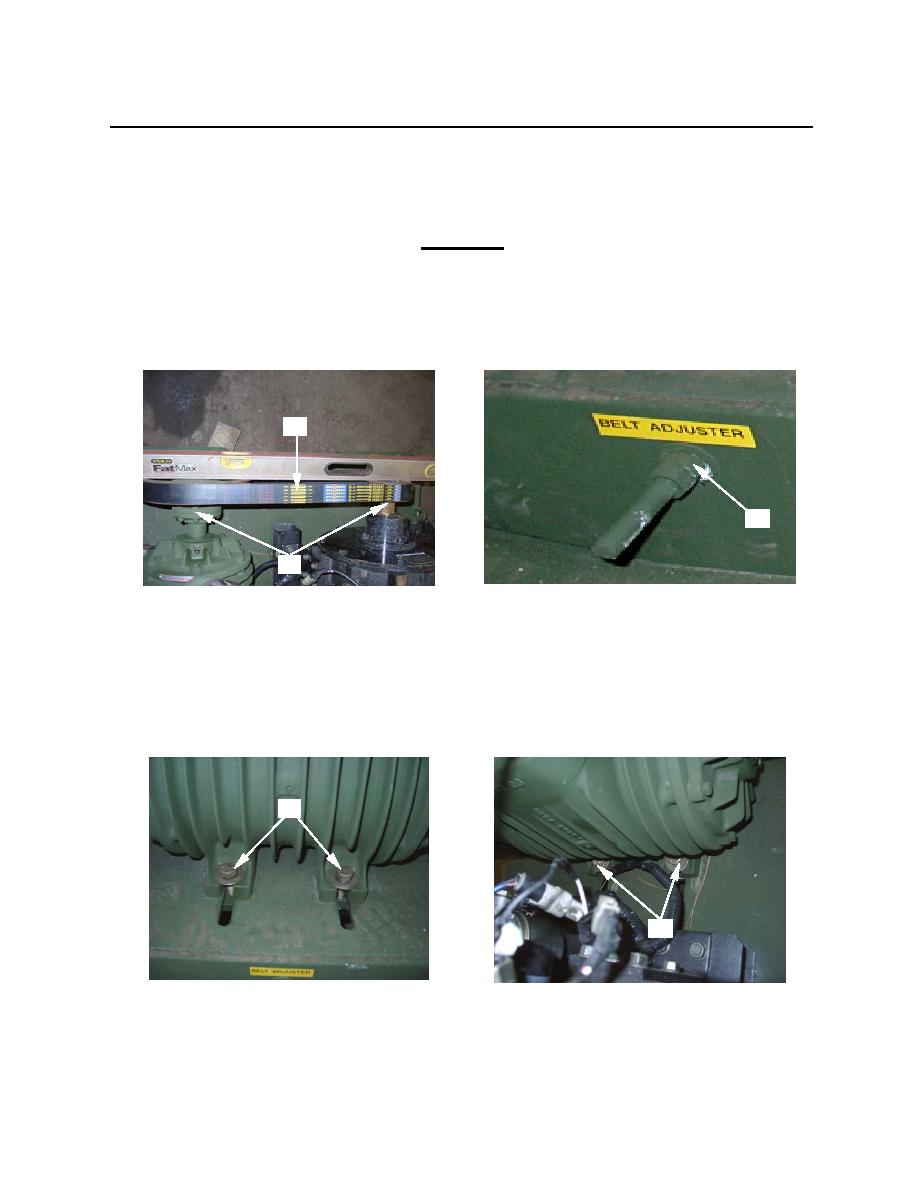
14. Peel the end tabs from the back of the belt tensioning gage and apply the gage in the center of the belt
with downward pressure only. Belt tensioning gage must read 0 zero. If not, apply a new gage.
CAUTION
While tensioning, if the yellow mark gets to the end of the window and
reappears on the left, the belt is over-tensioned. Reduce to correct setting.
15. Turn belt adjuster (figure 12, item 3) to the right to tighten the belt to a setting of 3.5 on belt tensioning
gage.
2
3
1
Figure 12. Belt Alignment and Tensioning
16. When the correct belt tensioning setting on the gage has been achieved, tighten the 1-inch outside
mounting bolts (figure 13, item 1) on the vacuum pump.
17. Tighten the 1-inch vacuum pump inside mounting bolts (figure 13, item 2).
18. Remove belt tensioning gage from belt.
1
2
Figure 13. Tightening Vacuum Pump Mounting Bolts
0029 00-8


