TM 10-4320-344-24
4.4.14 Piston and Connecting Rod Assembly Maintenance, Model 609-A. (Continued)
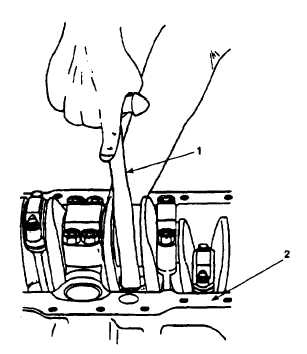
Figure 4-20. Removing Piston and Connecting Rod Assembly, Model 609-A.
d.
Using hammer handle (Figure 4-20,1) carefully push piston and connecting rod
assembly through top of cylinder block (2). Tag cylinder location on each
assembly removed.
e .
Repeating steps b through d, rotate crankshaft and remove remaining pistons
and connecting rod assemblies.
4.4.14.2 Disassembly.
a.
Place piston and connecting rod assembly in vise equipped with soft jaws.
b.
Using piston ring expander tool, remove four piston rings (Figure 4-19, 4, 5,
6, and 7). Discard piston rings (4, 5, 6, and 7).
c .
Remove two piston pin retaining rings (8).
d.
Push pin (9) out of piston (10) and piston pin bushing (11). Remove
connecting rod (12) from piston (10).
e .
Repeat steps a through d for five remaining piston and connecting rod
assemblies.
4-44