
TM 10-5430-245-13&P
0005 00
2
1
3
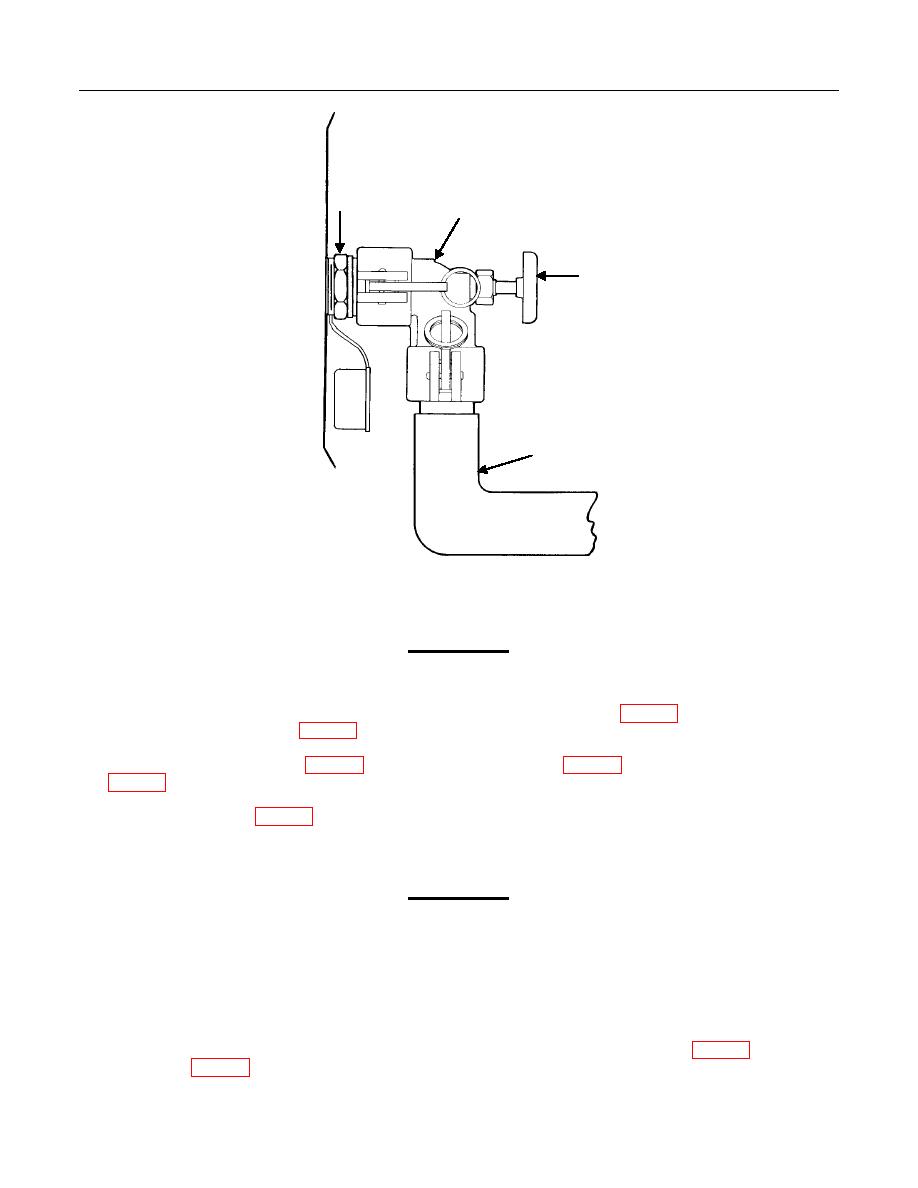
DRUM
4
TO WATER SUPPLY
CAUTION
To avoid damage to the drum, DO NOT overfill.
8.
When drum is completely filled (5.0 psi maximum working pressure), turn handwheel (Figure 7, Item 3) all the way
clockwise to close coupler valve (Figure 7, Item 1), thus shutting off the water supply to the drum.
9.
Unlock and remove coupler valve (Figure 7, Item 1) from adapter assembly (Figure 7, Item 2). Leave filler hose
10. Install one coupler valve (Figure 7, Item 1) to either drum end of the filled drum.
11. Repeat steps 3 through 10 for each drum to be filled.
CAUTION
Each drum comes with two coupler valves. After drum is filled, leave the
coupler valve installed on drum except during transportation. Remove
coupler valve from drum when being transported to prevent damage to
valves. During transport, coupler valves must remain with the drum so
they are not lost. Be sure coupler valves are protected from dirt and
other foreign matter when not installed on the drum.
12. When last drum has been filled, shut off valve at drinking water source and disconnect filler hose (Figure 7, Item 4) from
coupler valve (Figure 7, Item 1) that was used to fill drums. Leave coupler valve installed on drum. Install another
coupler valve onto the other end of the drum.
