
TM 10-4630-207-13&P
0024 00
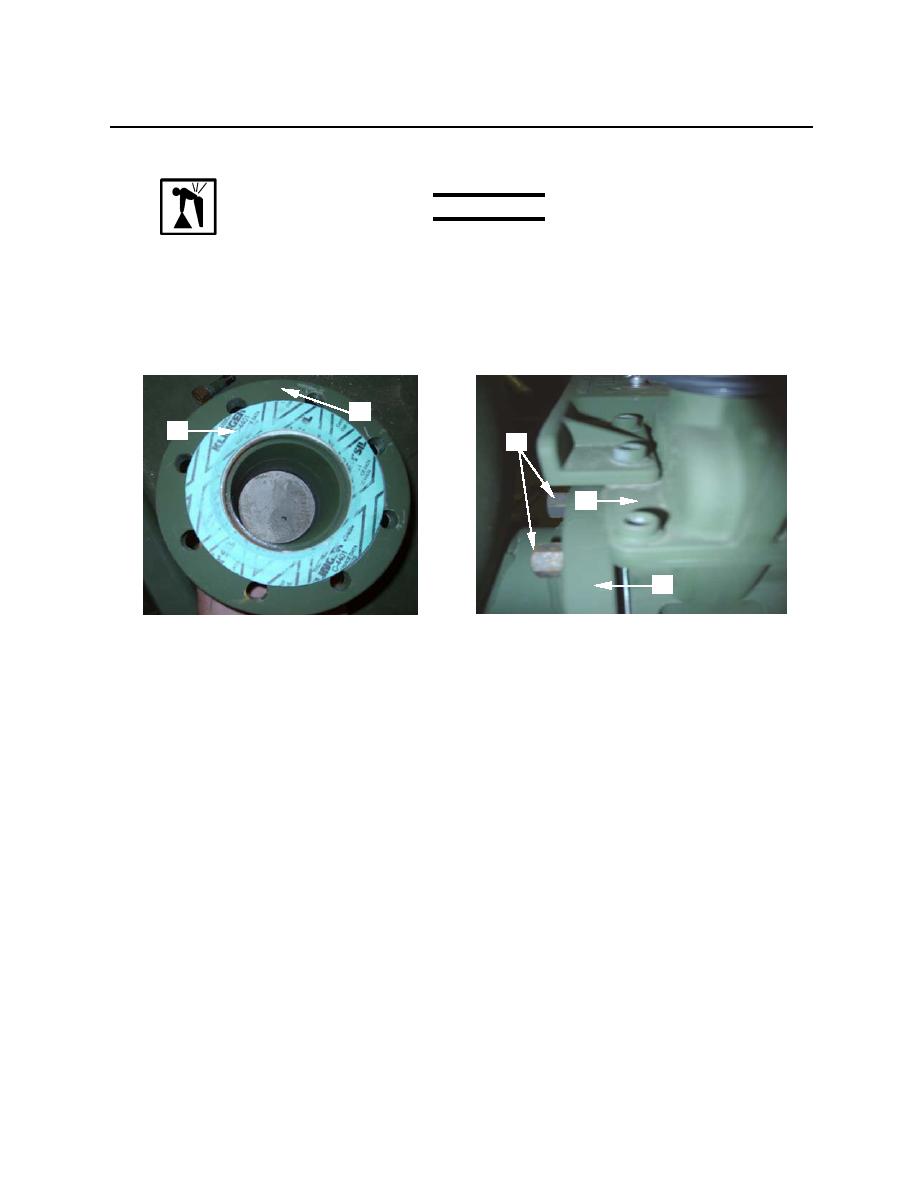
14. Place a new 4-inch gasket (figure 6, item 1) onto the rear flange (figure 6, item 2) as shown.
WARNING
The drain valve assembly is heavy. To prevent injuries, two people are
required to remove it.
15. Place new drain valve (figure 6, item 3) over the gasket onto the rear flange (figure 6, item 2). Pass
studs through top two holes on flange and install two nuts (figure 6, item 4). Hand tighten.
2
1
4
3
2
Figure 6. Installing Rear Gasket and Drain Valve
16. Place a new 4-inch gasket (figure 7, item 1) onto the drain valve (figure 7, item 2) as shown.
17. Install the six lower hex nuts and bolts (figure 7, item 3) securing front flange (figure 7, item 4) to the
rear flange (figure 7, item 5).
18. Install upper two hex nuts and bolts (figure 7, item 6) securing front flange (figure 7, item 4) to the
drain valve (figure 7, item 2).
19. Tighten all hex nuts and bolts on the front and rear of the drain valve in a star pattern.
0024 00-5
