
TM 5-3825-270-23&P
0168
INSTALLATION
WARNING
Adhesives, solvents, and sealing compounds can burn easily, can give off harmful vapors,
and are harmful to skin and clothing. Keep away from open fire and use in well-ventilated
area. If adhesive, solvent, or sealing compound gets on skin or clothing, wash immediately
with soap and water. Failure to comply may result in injury or death to personnel.
NOTE
Install hoses and wires as noted prior to removal.
Perform Steps (1) through (8) if left solenoid valve was removed.
Perform Steps (9) through (20) if right solenoid valve was removed.
1.
Coat threads of fitting (Figure 6, Item 27) with pipe thread sealant.
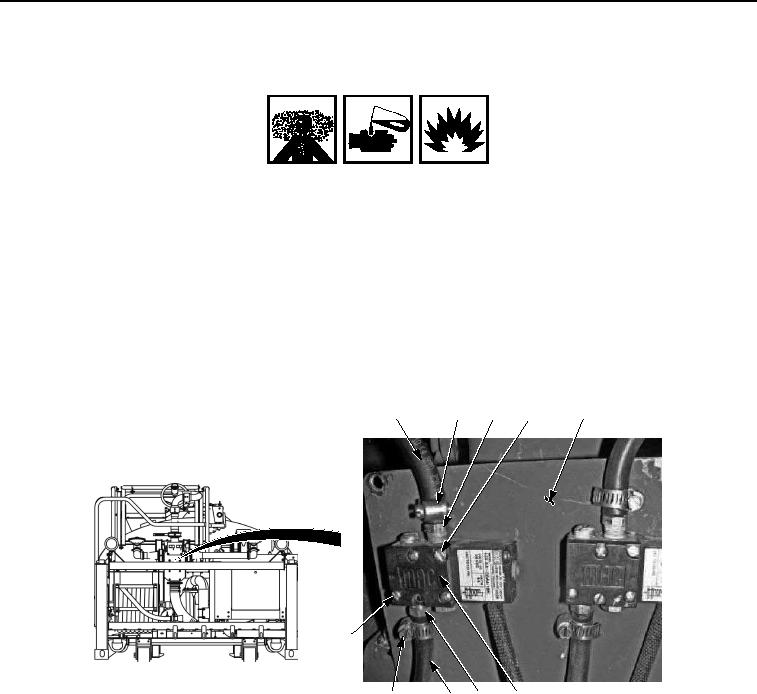
21
22
23 24, 25
10
24, 25
28
1
27
26
Figure 6. Solenoid Valve Installation.
2.
Install fitting (Figure 6, Item 27) on left solenoid valve (Figure 6, Item 26).
3.
Coat threads of fitting (Figure 6, Item 23) with pipe thread sealant.
4.
Install fitting (Figure 6, Item 24) on left solenoid valve (Figure 6, Item 26).
5.
Install left solenoid valve (Figure 6, Item 26) on frame (Figure 6, Item 10) with two screws (Figure 6, Item 24)
and locknuts (Figure 6, Item 25).
6.
Install hose (Figure 6, Item 1) on fitting (Figure 6, Item 27) with clamp (Figure 6, Item 28).
7.
Install hose (Figure 6, Item 21) on fitting (Figure 6, Item 23) with clamp (Figure 6, Item 22).
8.
Connect left solenoid valve connector lead (Figure 7, Item 19) to harness connector (Figure 7, Item 20).

